Basic Monitor Info
by Ian Primus
So, you’ve got a game with a monitor issue. Where to start? Start by finding out some basic information about your monitor, and about your problem. It’s very hard for us to be useful when presented with the question “My Ms. Pac has a lousy picture, how do I fix it?”. While that may be a valid question, it doesn’t have enough information. It’s like saying “My blue car won’t start”.
Things that are very helpful in determining the solution to your problem:
- The kind of monitor you’re talking about. There are dozens of different arcade monitors. It’s very, very helpful to know which one you need help with.
- The game you’re using it in. Some games have different monitor connections than others (positive vs. negative sync, etc).
- What is the monitor doing or not doing? A picture helps here sometimes, but a good description is even better.
How to identify a monitor:
For the most part, raster video game monitors are all pretty much compatible. A monitor from a Ms. Pac will work in Defender will work in Street Fighter, etc. Because of this, it’s very common for monitors to have been swapped throughout the life of a game. Not only that, the manufacturer didn’t necessarily use the same monitor throughout the entire production run of a game. They used whatever was available and cheapest. So, just because you have an original Robotron or whatever, there’s no guarantee that the monitor that’s in your original game is the same as what’s in mine. The only way to tell is to look at the monitor.
Exceptions to this are Nintendo monitors – those are pretty much always Sanyo 20EZ’s. And with vector monitors there are only a couple of types. If you have a vector game, then you’ve got one of like five monitors.
Look at the back of the monitor. Learn to identify the basic components. The picture tube is the large glass thing that the image is displayed on. This tube is NOT going to be unique to a specific monitor. The numbers on the tube only identify the tube itself, so they aren’t helpful in identifying the monitor. The deflection yoke is the coil of copper wire that goes around the neck of the tube. These all physically look very similar – but it’s good to know what the yoke is when working on monitors. The chassis is the circuit board that sits beneath the picture tube, and has all the electronics on it. It’ll have a flyback transformer – that’s the large block with the thick wire coming out of it. That wire connects to the anode of the picture tube with a suction cup. That’s the high voltage – don’t disconnct this without discharging first, or it’ll hurt . The monitor’s frame is usually where you’ll find the identifying marks – but sometimes also stuck to the side of a piece of metal on the chassis. It’ll say something like Electrohome G07 or WG19K4900 or somesuch. That’s the model of the monitor. That’s the vital piece of information.
It’s not uncommon for these tags to fall off though. So, if you can’t find it, there are a couple of ways to identify your monitor. Go to http://www.therealbobroberts.net/monitor.html for a bunch of pictures of monitor chassis. Try to match up what you have. The ones at the top are the most common ones.
Basic monitor gotchas:
DON’T disconnect the HV anode without discharging it first! The picture tube stores a charge, and it can zap you good if you’re not careful. To discharge, take a cliplead and attach one end to the monitor’s frame, and the other end to the shaft of a plastic-handled flat blade screwdriver. Slide the screwdriver under the suction cup untill you feel it touch the metal contact in the center. If the tube still had a charge, you’ll hear a nice POP! You don’t need to discharge the tube unless you need to disconnect that anode lead. And watch out, sometimes the tube can sort-of recharge itself, just enough to startle you. Do it again just to be safe.
DON’T connect a monitor directly to a wall socket! Most game monitors are “hot chassis”, and as such require an isolation transformer. Plugging such a monitor directly into a household wall socket will fry stuff. This especially includes Nintendo monitors. They have a standard looking wall plug on the cord, but that’s meant only for the 100v isolated socket in the bottom of the game.
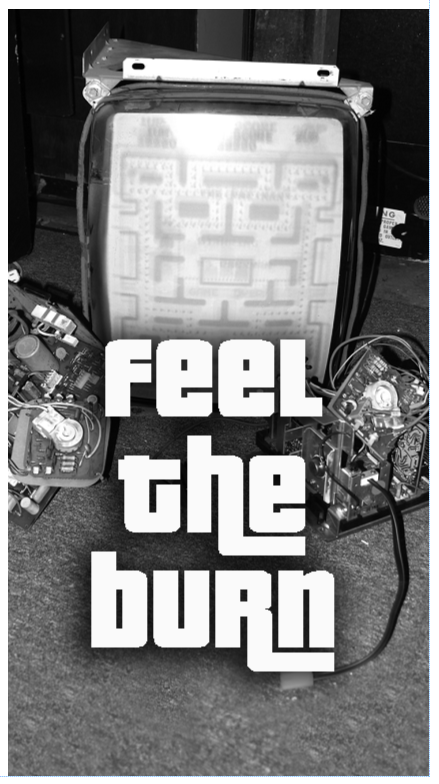
About screen burn:
Monitor screen burn is a fact of life when it comes to arcade machines. These games were running for many, many hours, and some of them display the same thing most of the time. This leads to screen burn. Basically, a monitor displays an image by drawing an electron beam across the face of a glass tube, the inside of which is painted with colored phosphor. When the beam hits the phosphors, it excites them, and they glow – i.e., they emit their own light. Over time, if the same phospor areas are constantly bombarded with electrons, and constantly glowing, they’ll start to wear and darken. They develop a brownish tinge, and emit less light. This area of the screen is now “burnt”, and will remain darkened like this forever. You can’t unburn a picture tube any more than you can unburn toast. The only way to fix it is to replace the picture tube.
Medium resolution:
Some newer games use what’s known as a medium resolution monitor. This monitor has a higher scan rate, and higher screen resolution. Medium resolution games are not compatible with traditional standard resolution monitors, and vice-versa.
Can I use a computer monitor?
Short answer: No. Long answer? Nnnnoooooooo.
The scan rates are incompatible. While converters do exist, the cost of them far exceeds the costs of repairing or replacing the monitor properly, and the picture quality will never be as good as a real arcade monitor.
What about LCD’s?
They do make arcade resolution compatible LCD’s. They’re very expensive, and don’t look as good as a real monitor. Similarly, there do exist converters to convert arcade video to VGA – they’re also very expensive, and it’ll look like garbage. Also, putting an LCD in an 80’s arcade game is considered a sacralige, much like cutting up a 1957 Chevy to shoehorn a modern engine into. And once you’ve seen a game so converted, you’ll understand exactly why people feel that way. It looks terrible.
Hopefully this helps you understand a little about game monitors, and enables you to ask helpful questions. We’re always happy to help and answer questions… but hearing the same thing a hundred times gets a bit old. Once you know your monitor’s model, you can always search this forum for more information on your problem.
Monitor repair is not something to be taken lightly. You should have a fair understanding of electricity before attempting to repair your arcade monitor. Do a little bit of reading on the internet. Things you should understand are the difference between AC and DC voltage, diodes, resistors and capacitors. Know how to recognize these parts and roughly what they do. Monitors do contain high voltages – and it’s important that you understand what you’re doing.
Discharging a monitor, and why you have to:
The flyback transformer generates the high voltage needed to accelerate the electrons toward the screen. This is in the vicinity of 20,000 volts. It is very low current, but it is high voltage. Modern flybacks contain built-in diodes to rectify the inherent AC output of a transformer. Now, most DC power supplies have a capacitor across the outputs to help smooth out the DC that the rectifiers create. A flyback circuit is no exception. However, in this case, the capacitor is the picture tube itself. One plate of the capacitor is the conductive outer coating of the tube, known as aquadag, or “dag” for short. In an arcade monitor, this is always grounded. That springy strap that goes across the back of the tube ensures that this coating is grounded to the metal frame of the monitor. The second plate of the capacitor is the inner coating of the tube. This is where the flyback’s anode connects to – through that little hole int the side of the tube. The glass the tube is made from becomes the insulator. This combination acts as a large capacitor, and does store a charge. What you’re doing when you discharge the tube is shorting out this capacitor, causing it to release it’s stored charge all at once (hence the zapping sound).
Some monitors have built-in bleeder resistors to bleed off this stored charge when the monitor is powered off. Many do not. For safety’s sake, always discharge a monitor before disconnecting the HV lead. Also, after the monitor has been discharged, it’s possible for a tube to build up a small charge again, due to reasons that I won’t bother going into. So, even though the anode lead has been disconnected, it’s sometimes still possible to get bitten by the tube itself. So, discharge, disconnect, re-discharge after thirty seconds or so. That second charge is very minor, but it sure will suprise the heck out of you!
Adjusting the colors:
There are several adjustments on an arcade monitor to adjust the colors. On the neckboard (the little board that plugs into the neck of the picture tube), there are a number of controls. These adjust the cutoff and drive to the picture tube guns. Some monitors have a full set for all colors, others only have controls for two colors. Their purpose is to adjust the gun signals to compensate for variation between the guns. On the flyback, there are two knobs, one labelled FOCUS, and one labelled SCREEN. The focus knob does just that – it focuses the picture. The screen control acts almost like a brightness control, boosting the screen voltae at the picture tube. Turn it up too far, and you’ll see retrace lines. Too low, and the picture will be dark.
To adjust your monitor, first dial in the focus. Adjust the control until the image looks uniformly sharp. Then, adjust the screen control – turn it up so that you see the haze, then back it down so that the haze goes away and your black areas are black. Adjust the individual color controls for the best color – turn them up too far and the colors bleed and smear. Sometimes it helps to turn up the screen control to get that haze while doing this. You want to be able to get white haze – not tinted haze. The idea is to get all three guns at the same output level, so that whites are white.
But the picture is distorted/washed out/crummy!:
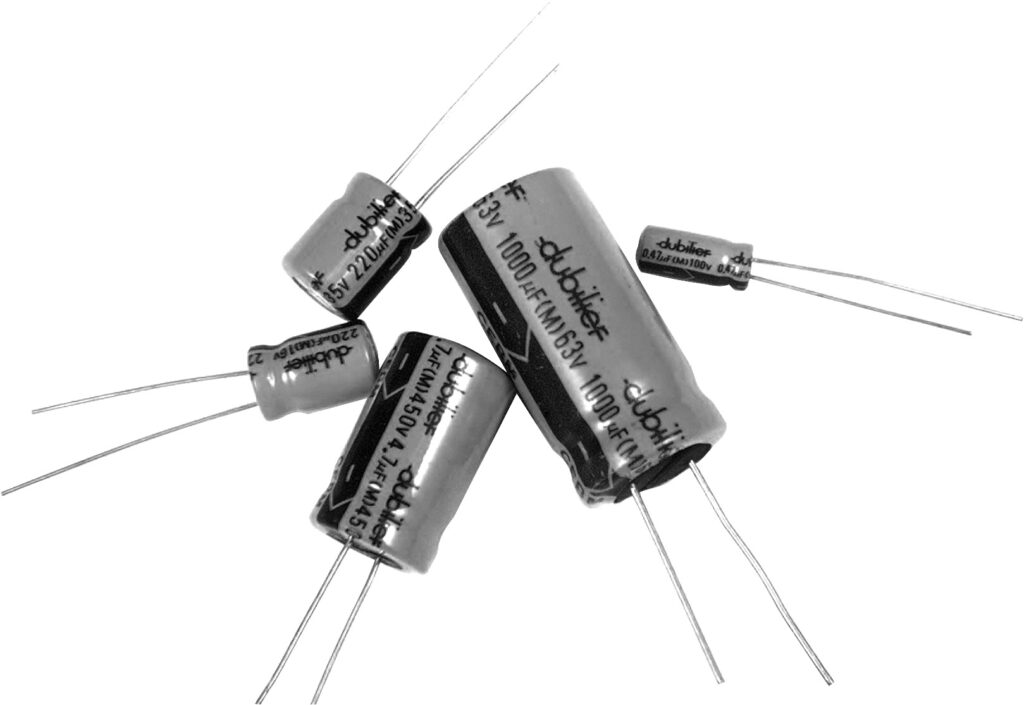
Then you might be due to replace the electrolytic capacitors in your monitor. Over time, these capacitors dry out and function poorly. Sometimes they can leak too. Electrolytic capacitors look like little cylinders, and are all over the monitor’s chassis. It’s pretty common practice with these older monitors to simply change all of them at one shot, since they’re all 20 years old or older at this point. This is known as a “cap kit”. To order a cap kit, you must determine the model of your monitor, and order the kit from Bob Roberts, ArcadeShop, Zanen Electronics, or other arcade supplier. Alternatively, you can write down the values of the individual components and order them from Mouser or any other electronic supplier. Problems usually solved by cap kits:
- folded over picture
- smeared, faded colors
- distorted picture
- touchy sync
But my monitor is totally dead!:
Then you probably don’t need just a cap kit – although now is as good as any to install one. Search out information on your specific monitor, this will help you repair it. Check the fuses on the chassis – usually failure of one of these is the result of some other, more serious failure elsewhere. You probably have a shorted semiconductor, blown flyback, or something else. See listing of incredibly common monitor failures, in a post below.
What’s this B+ I keep hearing about?:
B+ is the name given to the main power supply voltage in a monitor. It’s name goes way back to battery operated radios, and it’s the main DC power supply voltage. It’s exact voltage varies from monitor to monitor – you’ll have to check the manual for your monitor to find out what it should be, but it’s usually around 120v. For the Sanyo 20EZ, it’s 108v. For the Electrohome G07, it’s 120v. For the WG6100, it’s 180v. This voltage is adjustable on many monitors, but not on others (WG4900, for one).
So… how does this B+ supply work, anyway?:
Glad you asked (even though I know you didn’t). For a usual color raster monitor: Isolated AC enters the monitor chassis from the isolation transformer. This is 120vAC (100vAC for the Sanyo). It goes through the main chassis fuse, and occasionally a line filter. From there, it gets rectified by four big diodes, and turned into DC. This DC is then gets filtered by a big capacitor (usually 680uf at 200v or similar, it’s the biggest one on the chassis). After that, it usually goes through a fuse, then into a transistor based circuit containing the voltage regulator transistor and a large ceramic resistor. At the output of this circuit, there is usually a marked test point – or you can just test at the output side of that resistor.
And I test it… how?:
Set your meter to DC volts. Put the black lead on the metal frame of the chassis, and the red lead to the B+ test point for your monitor. This test point may be a labelled point on the board, or it may be one side of the large ceramic resistor – check your monitor manual. If your monitor has an adjustable B+, dial it in using the control. It’s important that the B+ be set correctly. Running it too high will result in a picture that’s too large, and could cause the monitor to go into shutdown to prevent the HV from going high enough to generate X-rays through the picture tube. Too low can cause a small picture, waves of distortion in the screen, or image instability.
Incredibly common monitor failures, sorted by monitor.
Electrohome G07:
No picture, monitor is dead. Small fuse on chassis is blown.
The flyback had died, and it took the horizontal output transistor with it (2SD870). This is so common, that most people replace these flybacks even if they still work. Replacement parts are inexpensive and easy to get, and a whole kit including the flyback, HOT, fuses, and all the caps is available from Bob Roberts as a rebuild kit. Replace the HOT, and flyback, and you should have your picture back – but you might as well replace all the capacitors while you have the chassis out. Don’t forget to adjust the B+ after rebuilding!
Picture too small, there’s black space on all sides.
The B+ voltage is too low. It should be 120v. You can adjust this with the control on the chassis – but do it while measuring that voltage. Get it as close to 120v as you can.
Won’t sync well to negative sync, but works fine on positive?
You’re going to like this one… Check resistors R314 and R317. They’re supposed to be 390 ohms. At some point, Electrohome goofed and fitted 4.7k’s here. These only affect the negativ sync circuits, not positive. So if the monitor was used in a positive sync game, this problem would never have presented itself.
Sanyo 20EZ:
The top of the picture is all curled over!
Capacitor C407 has gone bad. It’s right near the flyback, and it’s 10uf @ 160v.
The picture has hazy dim lines through it, they look like the bars of a jail cell!
Time for a cap kit. Lots of caps can cause this – when it gets to this point, it’s not worth trying to pinpoint the problem.
I have this wavy bar rolling through the picture.
Either your B+ is too low (should be 108v), or the main filter cap is bad. If you’ve adjusted the B+ and it’s still wavy, replace that cap. It’s the large one, C606. 470uf @ 160v
WG K7000:
Arcing, zapping noise, fuzzy picture, or clicking with picture distortion/flicker:
Look at the flyback. If it has white knobs, it’s time to replace it!